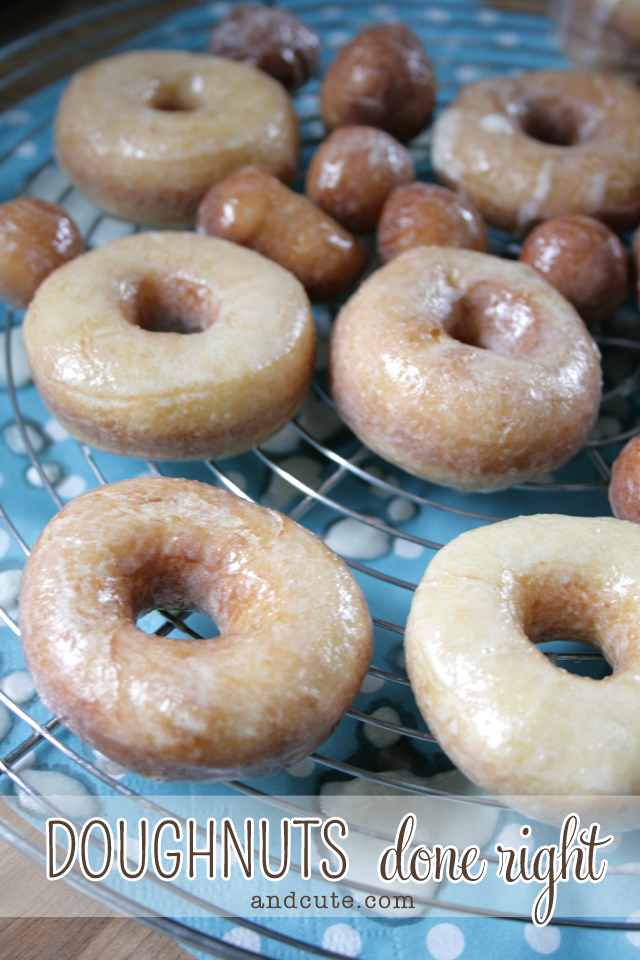
Oh my, these tender doughnuts were just right, they hit the spot and left nothing to be desired. Will you believe me when I tell you, they were so good, I didn’t even feel a need to put sprinkles on them?! You heard right, I refrained from sprinkles – what has the world come to?! 😉
I was on a mission to make a doughnut that was light in color, tender in texture and heavenly in taste. Aiming high as always. But having lived in California where Krispy Kreme set the bar high in terms of doughnuts, I just couldn’t settle for anything less. So when I found this pin and with it Leanne Bakes, I found the perfect recipe for it.
Ingredients
Doughnut
-
3 tbsp milk
-
3 tbsp boiling water
-
1 tsp dry active yeast
-
8 oz all purpose flour (use a scale)
-
1 1/2 oz sugar
-
1 egg
-
1 oz butter
-
dash of salt
Glaze
- 1/3 cup butter
- 2 cups powdered sugar
- 1 1/2 teaspoons vanilla extract
- about 4 tablespoons hot water
Method
1. Mix milk and boiling water in a glass measuring cup, add 1 tsp. of the sugar and the dry yeast. Put in a warm place to activate the yeast (I turned the oven to the lowest temp 50C and then turned it off and let the mixture sit in there).
2. In a mixing bowl combine flour, sugar and salt. Cut in the butter (I used my hands) to make a crumbly mixture.
3. Add the (lightly beaten) egg and the now foamy milk/yeast mixture. Combine into a dough.
4. Turn out on a floured surface and knead until elastic and cohesive. Place back into the mixing bowl, cover with a clean towel and let rise for about an hour in a warm place.
5. Roll out the dough on a floured surface about 1.5 cm thick and using a doughnut cookie cutter cut out the doughnuts and respective doughnut holes. Repeat with scraps of dough until it is all used up.
6. In a small sauce pan heat about 2cm of sunflower oil to 375F/190C using a candy thermometer to check the temperature. Meanwhile cover the cut doughnuts with a towel and allow to rise until the oil has reached frying temperature.
7. Combine all ingredients for the glaze and get a paper towel lined plate ready as well as a drying rack.
8. When you have reached the right temperature gently easy the first doughnut into the oil. Depending on the size and thickness you need to adjust the time and or frying temperature. My doughnuts where about 5cm in diameter when I cut them out, I found 20-25 seconds on each side was enough to get them cooked and have the outside stay light and tender. You might have to turn down the temperature slightly to make sure thicker doughnuts get cooked all the way and don’t burn when you leave them in for a longer time. For regular sized doughnuts the time given usually is 2 minutes per side – again, for my size doughnut that was too long and got the outside too dark.
9. Place fried doughnut onto paper towels and allow to cool slightly. Then submerge the (still warm) doughnut completely in the glaze and move (using 2 forks) onto the drying rack. Repeat until you are done.
Enjoy and please consider doubling the recipe, this was just enough for 2 adults and 2 small kids 🙂
Cheers,
Dani!

Ich bin eigentlich ganz froh, dass du das nicht in Kilo und Liter angibst 😉
Pah, ich wuerde es machen nur um dich in Versuchung zu fuehren 😉
Die Versuchung ist jedes Mal gross 😉 ich hab mir sogar schon mal was für den Einkauf notiert…letztendlich bin ich halt doch eher der Typ, der bei dir gern ins Cafe gehen würde, um mich durch Cake Pops, Cookies, Doughnuts und vieles mehr durchzuschlemmen. Für alles was mehr als zehn Minuten in der Küche braucht, reicht meine Geduld und Ausdauer nicht, die brauche ich komplett für Elisa 😀
Ach ja, die lieben Kleinen brauch schon ganz schoen viel Aufmerksamkeit 🙂 die Belohnung am Ende der Koch oder Backaktion motiviert mich aber immer 🙂